This post is a tribute to my sister and brother in-law-in-law. The first time we went to the beach with them they made the most AMAZING grilled pizza. I finally purchased the book they used and tried it for myself (see THIS post; also follow the authors blog posts on http://www.fornobravo.com/pizzaquest/). I don’t think I did as good a job as they did (see why after the recipe), but it was yummo none-the-less and I stuffed my face with it.
PSA: You will be full. You will eat more. Go stuff your face. STUFF IT!
Ingredients:
- 5 cups flour
- 1 tbsp sugar
- 2 tsp salt (or 3 1/2 tsp kosher salt)
- 1 1/4 tsp active dry yeast
- 1 1/2 tbsp olive oil
- 1 3/4 cups water, room temperature
Make the Dough:
- Combine water, yeast, and a pinch of sugar and let sit until foamy (about 10 minutes).
- Add in the olive oil.
- Mix in the flour, sugar, and salt until dough forms a coarse ball.
- Let sit for about 4 minutes.
- Mix until dough until dough stops sticking to the bowl.
- Divide the dough into 6 equal pieces.
- Round each piece into a ball and brush each ball with olive oil.
- Place each ball inside its own zippered freezer gallon bag, adding about 1 tsp of olive oil to each bag.
- Let bags sit at room temperature for 30 minutes, then refrigerate overnight (or at least 3 hours).
- Remove the dough from the fridge and let sit at least 2 hours before use.
Grill the Pizza:
- No less than 3 hours before grilling, take the doughs out of the refrigerator.
- Pour 2 tbsp olive oil (per dough) into a sheet pan.
- Roll the doughs in the olive oil and let sit on the pan for 2 hours.
- Roll out the doughs, to a thickness of around 1/8 inch without tearing it, with a rolling pin (in olive oil), return to sheet pan, and make sure the dough is covered in olive oil.
- Set up your grill with a hot side and cool side (for charcoal grill, graduate the coals so they’re close to the grate on one side and nearly empty on the other side).
- Clean the grate and spray with olive oil (so the dough is less likely to stick).
- Carefully lay the prepared dough on the hot side.
- The dough will begin to bubble within 30 to 60 seconds; once it begins to char, flip the dough over and place on the cooler side of the grill.
- Immediately brush the surface with olive oil and put on the toppings (you’ll need less cheese than on a traditional oven pizza).
- Close the grill lid (keep the vents open) and let sit for 3 to 6 more minutes until toppings cook and cheese melts.
- The pizza is ready when the cheese is melted and the underside is slightly charred.
- Repeat for the remaining doughs!
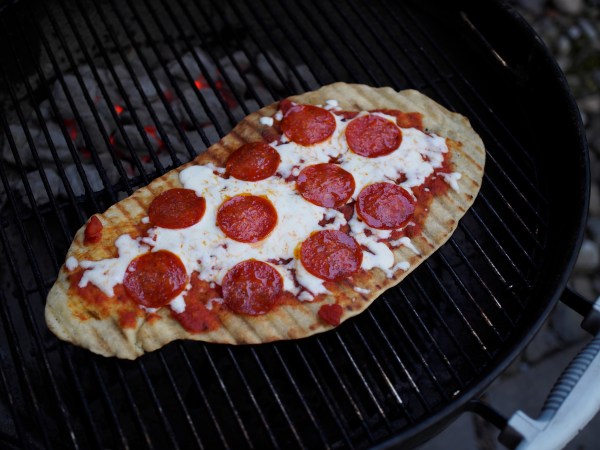
You’ll notice in the picture, the crust doesn’t look like crust at all. In fact, it looks like unleavened flatbread (which is still delicious, by the way). Don’t freak out if this happens to you, it’ll still taste yummilicious. I theorize this happened because of one of two things (or both of them):
- The yeast didn’t proof properly because it was old. It looked like it was trying to get foamy, but didn’t have that delicious yeast-bread smell. I clearly went with it anyway.
- I actually forgot to let the dough sit for 30 minutes before putting it in the fridge, so it didn’t get to rise enough (which, honestly, may not have happened because of reason number 1).
– 10 charma, + 15 persistance
Give doomthings your brain-words!